 We source the water pump seal and bearing for the Pan European and other bikes (contact us) We source the water pump seal and bearing for the Pan European and other bikes (contact us)
The pump fitted to the ST1100 was never intended to be serviced so it took us a long time to source the correct pump bearing and seal, also to find a method to replace both.
Here are instructions on how to do this. It is relatively straight forward but you need a hydraulic press and some sockets.
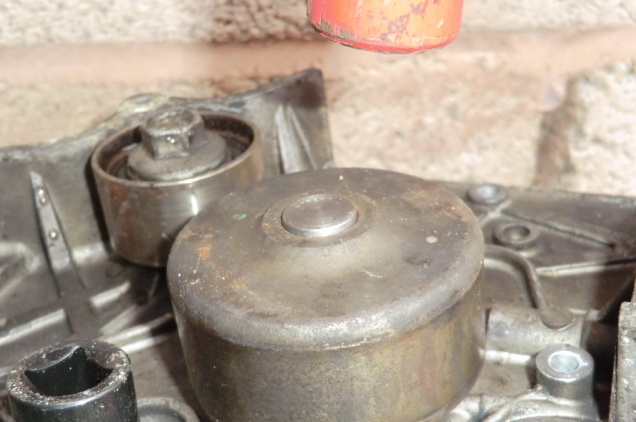
 Heat the water pump up using boiling water to loosen the bearing, a better way is to cook the pump in an oven at 180C for 15 mins but this really depends on how much of an understanding wife you have, it will stink out your kitchen. Heat the water pump up using boiling water to loosen the bearing, a better way is to cook the pump in an oven at 180C for 15 mins but this really depends on how much of an understanding wife you have, it will stink out your kitchen.
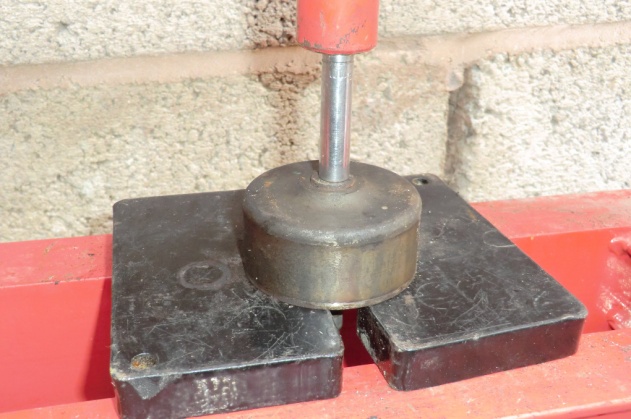
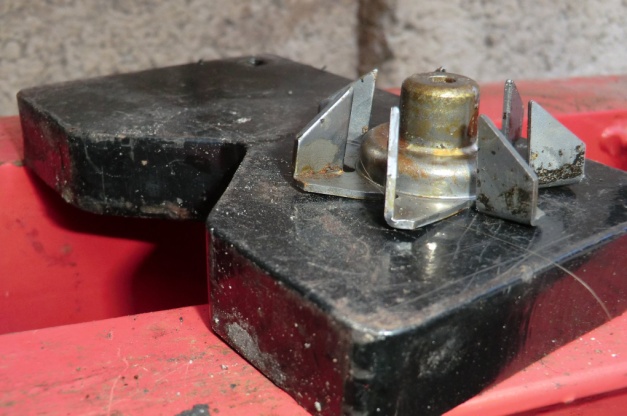
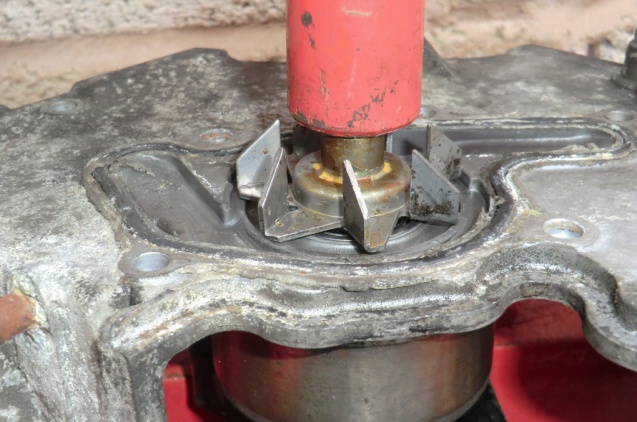
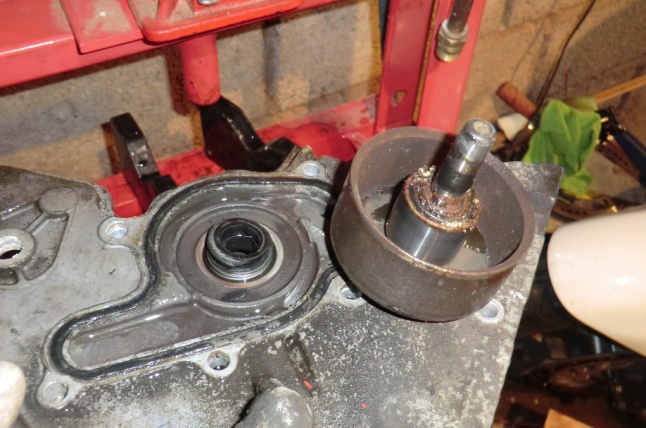
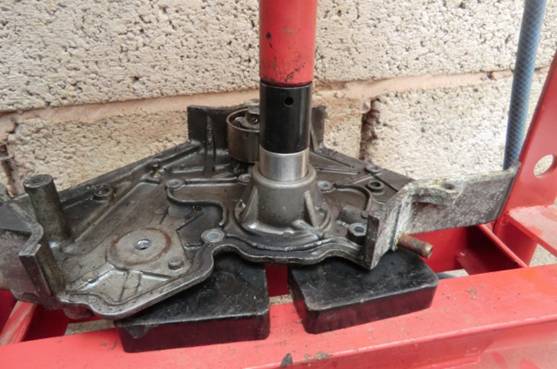
Make sure the pump is well supported in the press as close as you can get to the bearing.
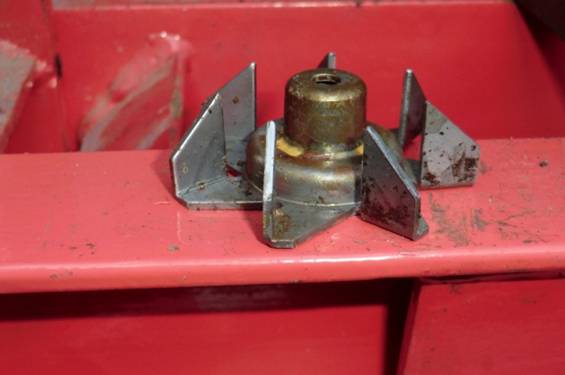
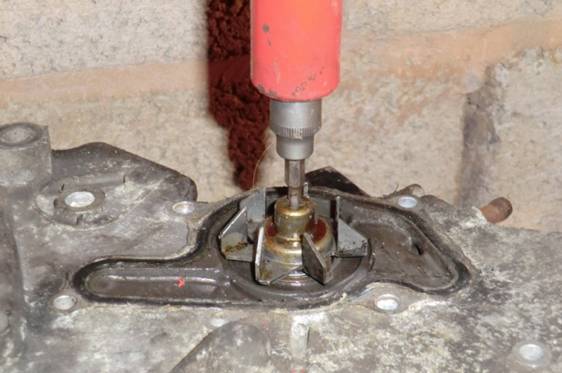 To avoid damage to the impeller we are going to press the bearing a little though the hole in the top, use a 6mm hex drive socket. To avoid damage to the impeller we are going to press the bearing a little though the hole in the top, use a 6mm hex drive socket.
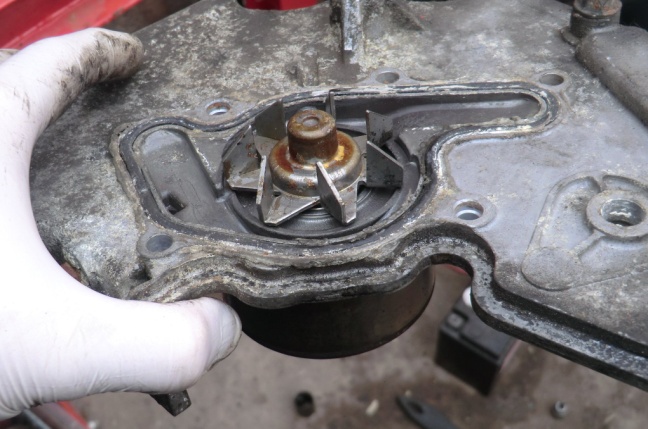
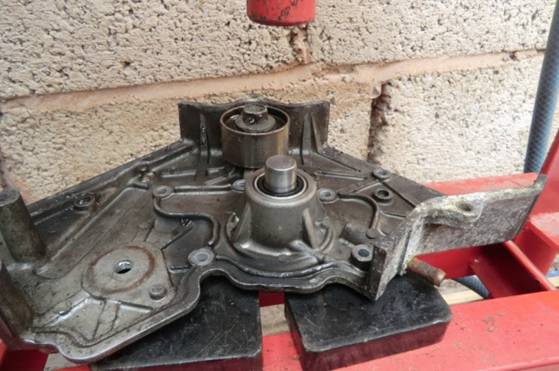
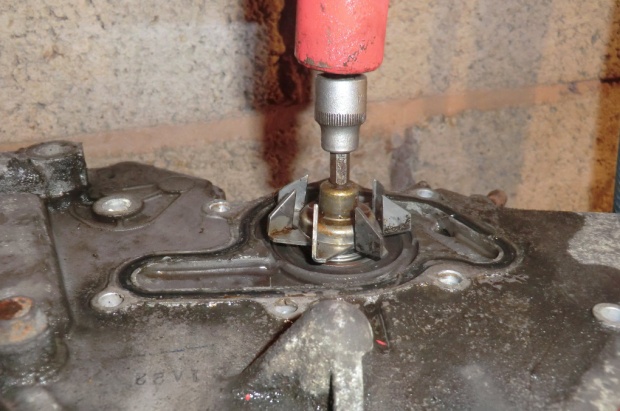 Press the bearing as far as possible, this should release the impeller. Press the bearing as far as possible, this should release the impeller.
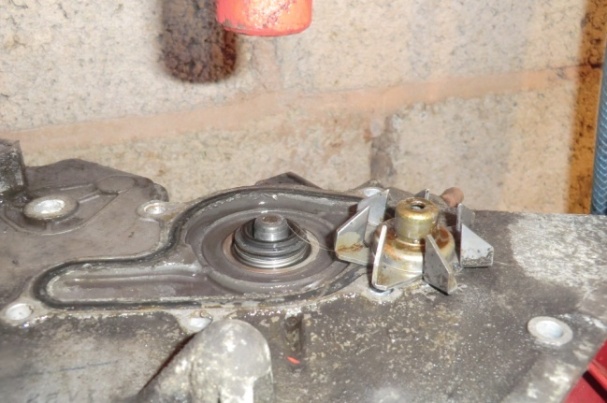 Lift the impeller off. Lift the impeller off.
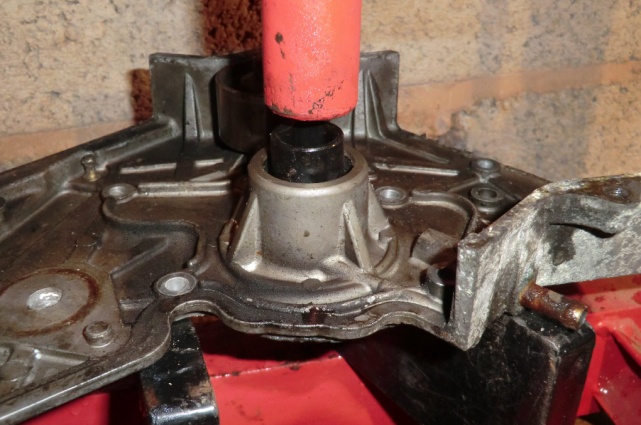
Press the bearing out using an 8mm long 1/4in socket
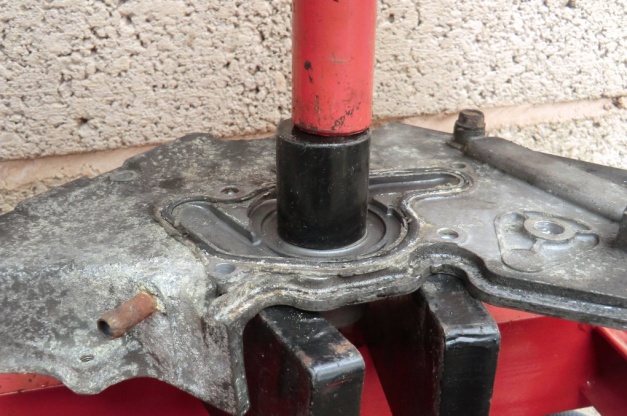
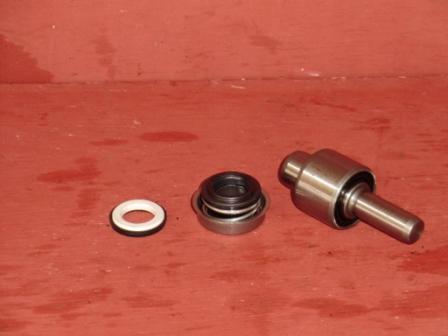
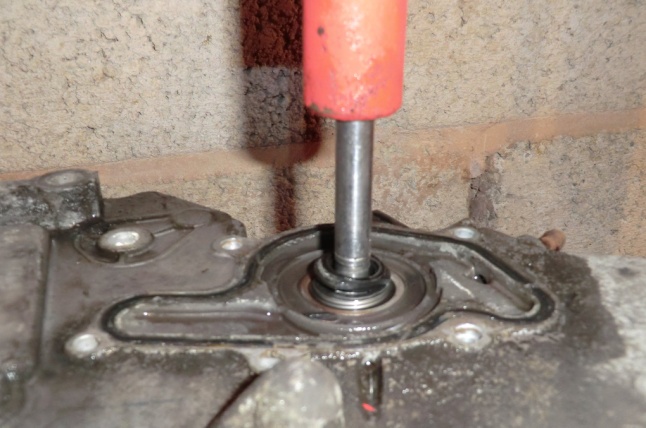
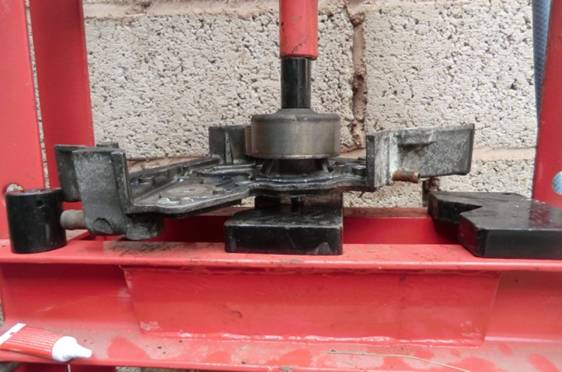
 Turn the pump over and press out the seal body using a 16mm 1/2" socket . Turn the pump over and press out the seal body using a 16mm 1/2" socket .
 Press the bearing from the pulley using the 8mm 1/4" socket. Press the bearing from the pulley using the 8mm 1/4" socket.
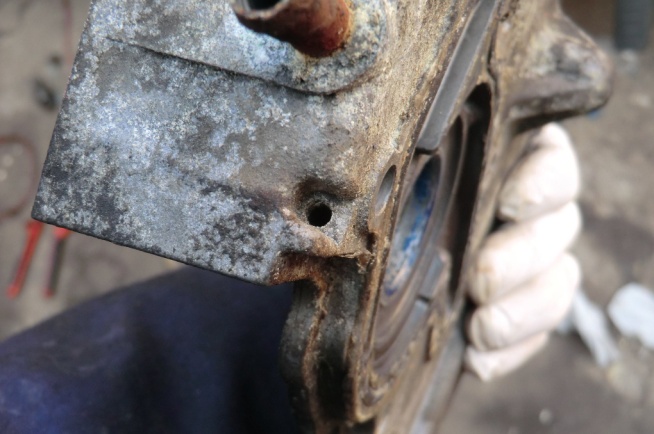
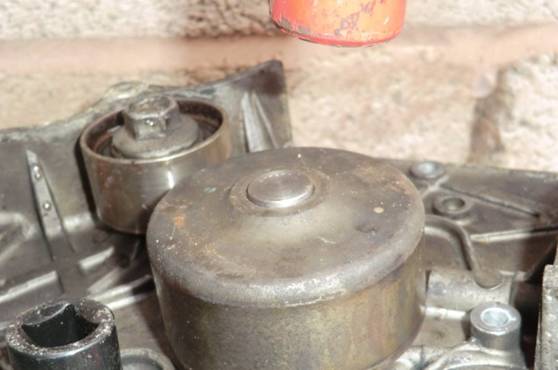
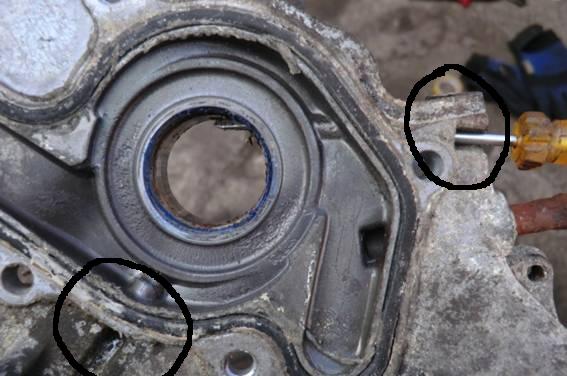 There are two bleed / vent holes between the seal and the bearing, and the outside edge of the pump, make sure they are clear, they tend to corrode closed and are a pain to clear but has to be done. This is why the bearing fails, the vents blocked up so the coolant had nowhere to go but into the bearing. There are two bleed / vent holes between the seal and the bearing, and the outside edge of the pump, make sure they are clear, they tend to corrode closed and are a pain to clear but has to be done. This is why the bearing fails, the vents blocked up so the coolant had nowhere to go but into the bearing.
 Reassemble, Press in the new bearing from the pulley side so the edge is flush with the casing. Use a 22mm socket. Reassemble, Press in the new bearing from the pulley side so the edge is flush with the casing. Use a 22mm socket.

Press in the new seal with a 22mm socket.
 press on the pulley wheel until the shaft protrudes by 1mm out of the pulley. press on the pulley wheel until the shaft protrudes by 1mm out of the pulley.
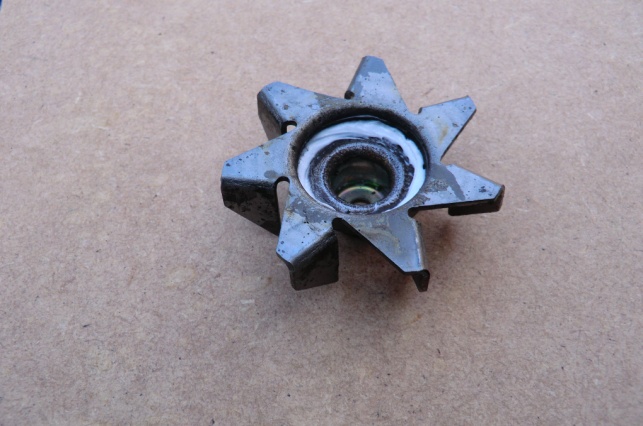
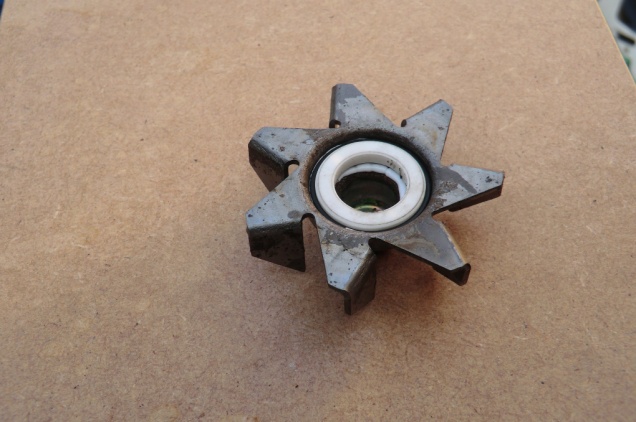
 Put the impeller on to a flat surface and check the blades are straight, they will probably be bent a little so straighten them out. Put the impeller on to a flat surface and check the blades are straight, they will probably be bent a little so straighten them out.
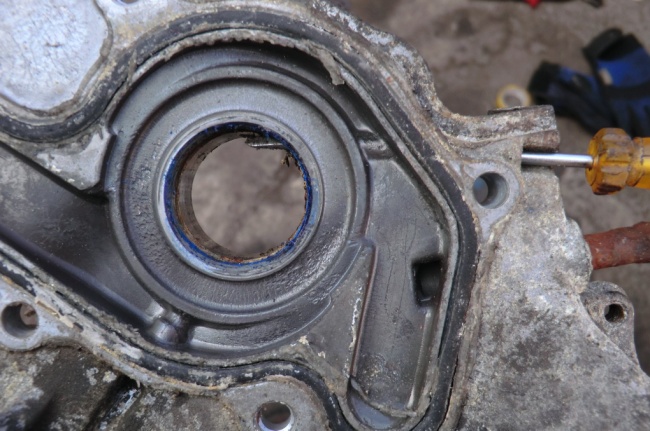
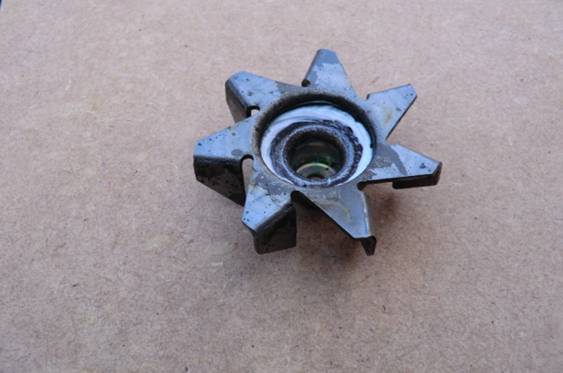 Remove the old seal and clean out the hole. Fit the new rubber seal into the impeller using a little silicon sealant, this maybe a tight fit, don't force, rub the rubber seal around the edge with some sand paper to achieve a "fall in fit" if required. Remove the old seal and clean out the hole. Fit the new rubber seal into the impeller using a little silicon sealant, this maybe a tight fit, don't force, rub the rubber seal around the edge with some sand paper to achieve a "fall in fit" if required.
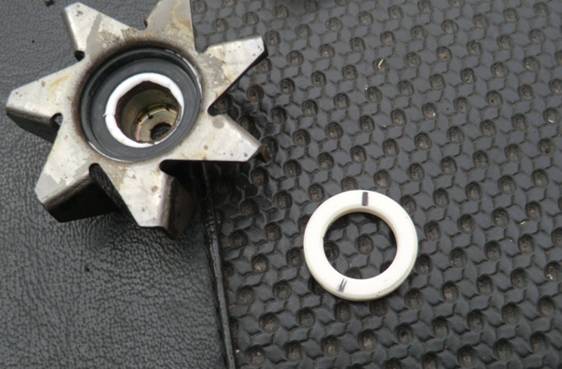
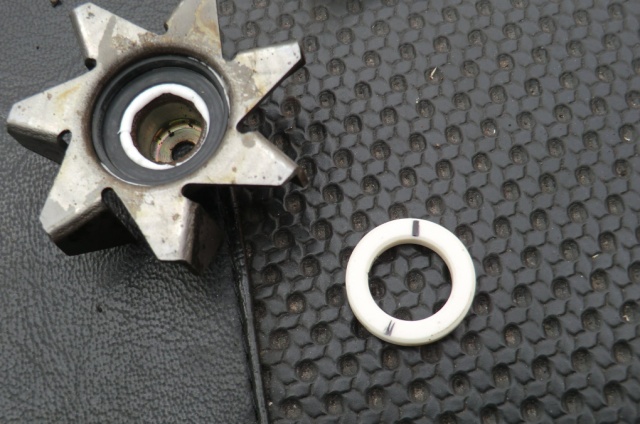
Fit the white ceramic washer, the side with the black marking goes against the rubber, don’t mix it up or the seal may not be water tight.
 Make sure the surface of the ceramic seal is clean and free from oil, any oil or grease will cause premature failure. Make sure the surface of the ceramic seal is clean and free from oil, any oil or grease will cause premature failure.
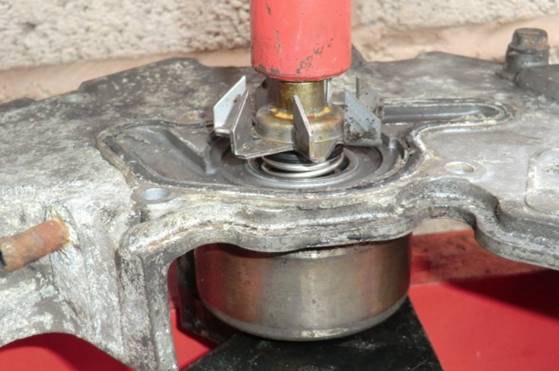 Press the impeller onto the shaft. Press the impeller onto the shaft.

 Check the impeller clearance, it should be about 1mm, closer is fine but higher risks hitting the engine block. Check the impeller clearance, it should be about 1mm, closer is fine but higher risks hitting the engine block.
The impeller will be a little stiff to turn, this is normal since the coolant is used as a lubricant. DONT OIL IT !
|